
Table of Contents
Bài 5. Connect Database XAMPP and 000Webhost
นอกจากการดูบทความนี้แล้ว คุณยังสามารถดูข้อมูลที่เป็นประโยชน์อื่นๆ อีกมากมายที่เราให้ไว้ที่นี่: ดูเพิ่มเติม
PLAYLIST VIDEO VỀ WEBSERVER NÀY ĐÃ CŨ, MÌNH SẼ LÀM MỘT PLAYLIST KHÁC VỀ WEBSERVER XỊN HƠN VÀ MỘT PLAYLIST DÙNG NODEJS TRONG TƯƠNG LAI, CÁM ƠN CÁC BẠN
Nếu có sai sót mong các bạn thông cảm
Link code : https://drive.google.com/open?id=1LaH…
0:00 Mở database trên XAMPP
0:20 Các chú ý và truy cập vào database trên XAMPP
1:00 Cách xoá một database
1:24 Cách tạo một database và chọn Collocation
1:46 Đặt tên và tạo số cột cho table
2:05 Đặt tên cho các cột và các giá trị , collocation , key ,…
3:19 Ấn vào lại tab database có tên mới tạo để thấy được 2 cột đã được tạo
3:32 Nhập data vào bằng tay (Chức năng insert có sẵn trên database)
3:57 Nói về việc hiển thị thông tin ra ngoài cho người dùng
5:14 Demo bài tập tiếp theo (Get data từ database và in ra màn hình với code PHP)
5:30 Thử insert thêm và demo in dữ liệu
7:46 Nói về bài tập INSERT DATA
8:25 Demo bài tập INSERT DATA
9:10 Nói về việc chia ra hai file làm gì?
10:05 Kiểm tra dữ liệu insert trên database thử
10:44 Link Code sẵn trên web: https://www.w3schools.com/php/php_mysql_intro.asp
11:24 Giới thiệu code INSERT và đôi lời nói về code trong link bên trên
12:00 Bài tiếp theo , nhập và kiểm tra , xoá
12:30 Demo hết chức năng trong bài tập trên
DI CHUYỂN SANG DATABASE TRÊN 000WEBHOST
14:32 Đăng nhập vào 000webhost.com và vào database
15:15 Các lưu ý !!!!!!!!!!!
16:40 Thử tạo database mới nhưng k được nhé các bạn , với 000webhost phải xài cái có sẵn
17:10 Tạo table trên database có sẵn của 000webhost (lưu ý ít các thuộc tính hơn)
19:00 Bài tập cuối,demo bài này cùng các chức năng của các bài bên trên với table đẹp , rõ hơn

How To Create A Database For Your Website
How to create a database for your website using https://www.webstarts.com and airtable.
🔴 Click here to subscribe https://www.youtube.com/subscription_center?add_user=webstarts

How to Connect to MySQL Database in IntelliJ IDEA
In this video, I’d like to share with you how to work with MySQL databases inside IntelliJ IDEA using its Database tool, so you don’t have to use any external tools like MySQL Workbench or MySQL Command Line Client.
In details, you will learn:
Define a datasource and Make connection to a MySQL database
Create a new table
Update data in a table
Execute SQL statements
Use SQL inspection suggestion in Java code
Suppose that you’re using these software programs:
Java Development Kit (JDK)
IntelliJ IDEA Ultimate
MySQL Community server
Connecting to a SQL Server Database with C#
Learn C: http://learncsharp.org
In this video you will learn how to connect to an already existing SQL Server database, read data from that database, and output that data to the console. This example could be leveraged across many platforms and is just one example of how data can be retrieved from a SQL Server database using C.
The idea behind my videos as http://learncsharp.org is to provide you with an experience where we are working together. I’m going to make mistakes, there are going to be bugs in my code, but it’s much more like paired programming than a scripted tutorial. It’s more realistic.

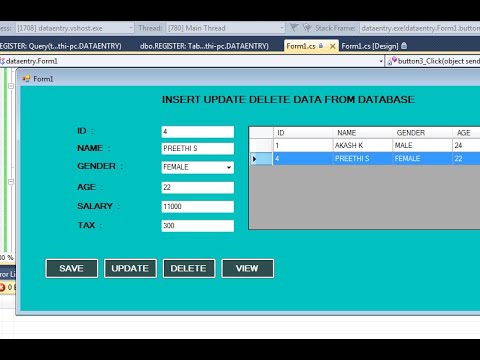
Insert,Delete and Update data in database from datagridview in c sharp
These tutorials teach how to insert data’s in SQL server using windows forms. This tutorial helps to insert, delete \u0026 update data’s through gridview to the database in a step by step with very basic and easy steps.
Email: [email protected]
นอกจากการดูหัวข้อนี้แล้ว คุณยังสามารถเข้าถึงบทวิจารณ์ดีๆ อื่นๆ อีกมากมายได้ที่นี่: ดูวิธีอื่นๆBUSINESS & INVESTMENT tại đây